French bureaucracy is complicated for a number of reasons, not least the fact that it’s charged with keeping French bureaucracy going. In the UK, 11% of the workforce works for the government in one capacity or another – policemen, nurses, bureaucrats, whatever. In France, the percentage is 24%. Twenty-four percent! A quarter of the workforce which does nothing productive at all, just spends its days providing fodder for the nation’s stand-up comedians and moaners. Blimey.So today at school we spend an hour learning about the French judicial system which, according to the bureaucrats who organise the French educational system, I need to know about before I’m safe to unleash on the omelette-and-chips buying French public.Like much of the civilised world, French government is divided into Executive, Legislative and Judicial branches (are you asleep yet? Try reading this in a hot, stuffy, sunlit classroom after getting up at 6 am, working in a hot kitchen all morning and then stuffing yourself with stodge at lunchtime) and the separations thereof “As detailed in the 5th French Constitution of 1958, the fundamental text of the Republic, of the state of law and democracy,” I noted before nodding off. And then I woke up and drew a huge diagram of the French judicial system, the eight tribunals and all the rest of it. Blimey. No really, blimey.Anyway. Luckily this morning was much more interesting. The cookery we learn at school is very traditional; the recipes largely date back to Escoffier and the early 20th century, some beyond that to Careme or earlier. It’s the basis of French cuisine from which everything since has sprung – this is how Escoffier made a fond de veau, veal stock, no one has found a better method so this is how we do it now is what we are told at school. The French are, quite rightly in my view, very proud that their cuisine is the foundation of most cookery in the Western world and, naturally, insist that theirs is the best version of it available.In a way it’s reassuring; these methods have been tried and tested by generations of chefs over more than a hundred years so they work and work well; equally it’s discomfiting to realise that, if your recipe doesn’t work it really is your own fault and it’s really you who’s done something wrong.I am most discomfited by things which are supposed to rise and foam, everything from whipped cream to bread. So today I have the cold sweats as we approach the pâte à brioche which we are going to use to make a favourite snack dish of many French people, the saucisson brioché, sausage in a (brioche) bun, i.e. posh sausage rolls.Frankly I’d much rather make the saucisson, a process that interests me much more than baking simply because I know I can do it. I’ve already written about how Pascal, the nice chap with whom I share a workstation at school, whips my cream for me while I cut his potatoes into pretty shapes. My inability to make things rise extends to bread too I’m sure, since every time I’ve tried making it myself at home – either manually or in a bread machine – I’ve managed to produce only doorstop-quality lumps of flour and water so unleavened the ancient Israelites would be proud of me. Although if one of my loaves fell on them out of the sky they’d end up with concussion rather than a decent feed. I have no idea why I can’t make bread or decently-risen cakes; I have warm hands, I have acid sweat, I am stupid – all are possibilities and, indeed, true in at least two of the three cases. The fact remains that, in the rising stakes, I’m a non-starter.So brioche, Chef Garnier assures us, is easy. Anyone can make it. It’s almost as easy as profiteroles, he says. My profiteroles always end up as flat as my Yorkshire puddings, I tell him, and have no reason to think that my brioche will be any different.We’ll see, he says.The lesson starts with a discussion of flour types; today we’re using what is known in France as Type 45 or Farine de Patissier, since it is very rich in gluten, the protein which gives it the strength to stay up once it’s risen. “This is very white flour,” he tells us. “Even whiter than English skin.” Har har, who would he tease without an English guy in the class? Anyway, the higher the number the less gluten the flour has, Chef tells us. Right.So we sieve the flour and form it into two adjacent rings, one large and one small. These are fontaines, which literally means fountains but translates better as wells, to receive, in the large one, the majority of the liquid and eggs; the smaller one takes the yeast dissolved in a little of the warmed milk; the large well takes the sugar and, importantly, the salt. Mix the salt and yeast and the former kills the latter and your dough will not rise. Hmm. Perhaps salt from my sweaty hands is killing the yeast? But then why am I equally incapable of making cakes rise when using levure chimique, baking powder?Anyway. We mix up the two wells separately for a couple of minutes, adding the salt, sugar and eggs to the large well before mixing the two fontaines together. The mixture, we are warned, must be neither too dry nor too humid; it must have body, Chef says, and you give it body by battering it against the steel worktop, throwing it down and lifting it up like some sort of alien blob, thumping it down to Give It Body. It’s done when it no longer sticks to the counter, apparently, but the fault in the process here is that, until it no longer sticks to the counter, it sticks to the counter. And your hands, clothes, hair, face and anything else it touches. So much for Escoffier’s great recipes.But eventually I wear my dough out enough so that it gives up (most) of its hold on me, my clothes and the worktop and I add little parcels of softened butter (beurre en pomade en petits parcelles) before leaving it to rise for half an hour at 30-35 degrees. At which point we ‘chase out the carbonic gas’, as Chef translates it (badly) for me before allowing it to rise again.Roll it out, wrap it round your sausage (Ooh Missus!), paint it with egg yolk and into the oven for 45 minutes or so until it looks just like the ones they sell in the shops. Well, a misshapen version of one they sell in the shops, one which only my mother could love and even she would be caught feeding it surreptitiously to the dog under the table when she thought I wasn’t watching.Still. Chef deems them all Good Enough to let us out to lunch and we trek off to the school canteen to eat, well, saucisson brioché. What a coincidence. I am careful to choose a slice from one not made by me and quite tasty it is too, if you ignore most of the pastry and eat the bought-in saucisson inside.And avoiding the stodge is a good idea, it turns out, since there’s that aforementioned class on the French legal system immediately after lunch.We eventually escape with our lives after a nice nap to spend the afternoon making ‘Chou de ménage’, household cabbage. What?Household cabbage, it turns out, is a cabbage cut into quarters and then used by Chef as an example of ‘Braiser par expansion’, braising by expansion whereby the delicious taste of the cabbage expands out into its cooking medium (can you spot the fatal flaw in this argument, children? Can you?)Anyway. Trim your cabbage, cut it into four equal quarters, rinse it in vinegared water to kill the beasties, blanch in boiling water for a few minutes, refresh in iced water, drain, cut off the root which you’d left to hold the whole thing together while it cooked (oops), fry off your Garniture Aromatique (onions and carrots cut into a nice macedoine), add the cabbage wrapped with bacon or couenne (the membrane which surrounds a pig’s stomach – very useful for holding together things which would otherwise float off and do their own thing – pop it into your casserole dish and cook it in the oven at 200 degrees Centigrade for an hour and a quarter. Blimey. All this for braised cabbage? Ah, but the lessons are about braising and wrapping and making a macedoine with everything the same size. It’s just a shame that we couldn’t have learned these lessons on something edible.Still. We finish off the afternoon with some Pommes Fondants, melting potatoes. The object of which, of course, is not to finish up with melted potatoes. Well, not until they arrive in the client’s mouth that is. We start with large potatoes, 7-8 centimetre jobbies which we cut in two and then turn so that they’re all the same size and with the legally obligatory seven-sided shape and then cook in a buttered dish in the oven, moistening regularly with ‘fond blanc’, white chicken stock (i.e. stock made from unroasted chicken bones – as opposed to fond brun, which is made with roasted bones) so they sit up to their waists in it. Except that, at the end of the cooking time (an hour or so) the liquid should all be just evaporated and your spuds barely coloured. So get that one right or turn your pommes fondants into pommes on fire.
Chapter 27: Week 25: A little cheffy common sense
04 Monday Jul 2016
Posted in Uncategorized
 But Magnus Nilsson takes this to a new, Olympic level; a chef who closes his restaurant for two months of the year so his brigade can design and rehearse the new season’s dishes.His book,
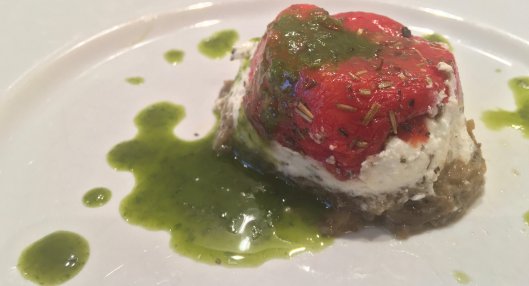
 When they’re cooked, scrape the flesh off the skin and squish it up between your fingers so there are no big bits. You’re looking for a fairly rustic effect here. The original recipe calls for sheets of gelatine to be added at this stage to firm up the caviar, but I prefer not to use it. Your choice – if you prefer firm aubergine caviar you should use two sheets per kilo of flesh.
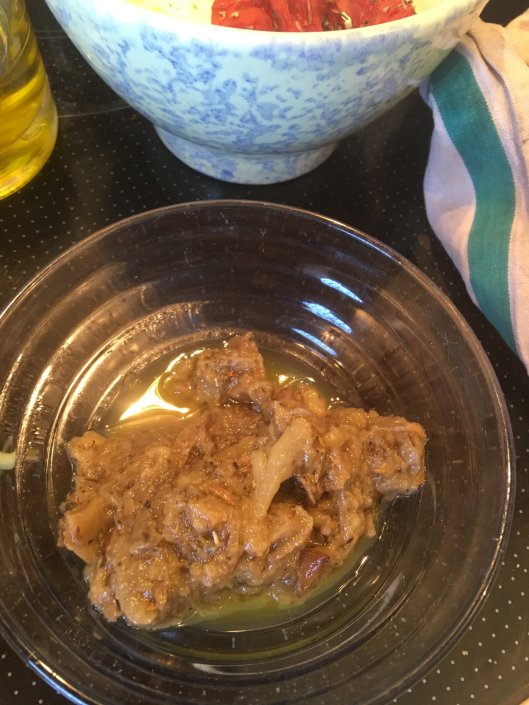 Take the tomatoes out of the oven when they’re dried enough.
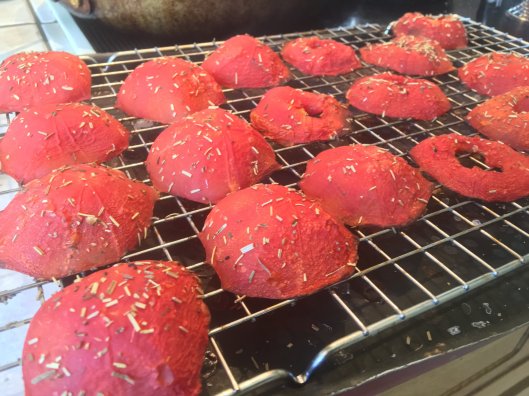 The last ingredient to mix is the goat cheese. Buy the youngest, freshest pelardons you can find, the fresher the better – I buy them on the local market at just 4 days old when they’re just starting to firm up and have a delicious, goaty flavour. (They’re delicious spread like butter with Vegemite on toast, too).
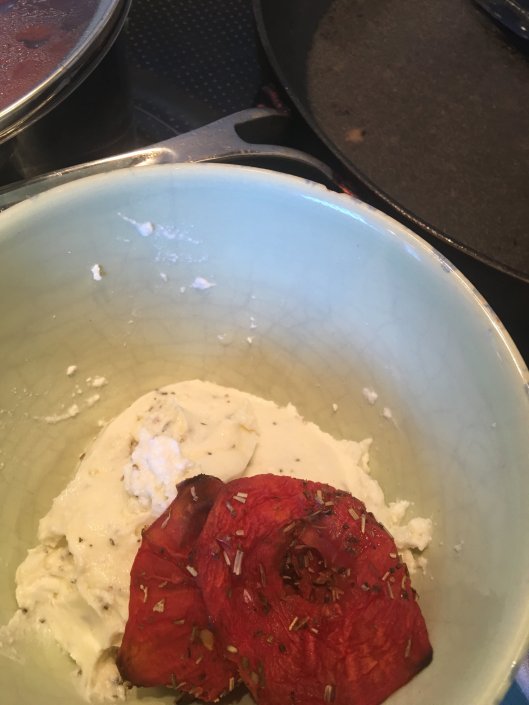 Mash them up with a fork, a light sprinkle of salt and Provençal herbs and some of your sippin’ quality olive oil – just enough to bring the mixture together, you don’t want this to be liquid.Now comes the assembly. Put a small dribble of olive oil into the base of a silicone cupcake mold, then a tomato half. You will have two types of tomato halves, of course, one with a hole in the middle and one without. Serve your guests the pretty ones, obviously.After the tomato comes a dessert spoon of goat cheese mix, then another of aubergine caviar.
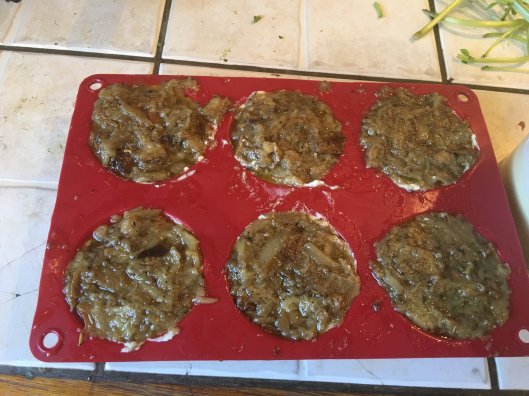 Pop them into the fridge for at least an hour to allow them to ‘set’ a little before serving.While they’re in the fridge, make some basil sauce to serve them with. Strip the leaves from a whole basil plant and put them into a pot.
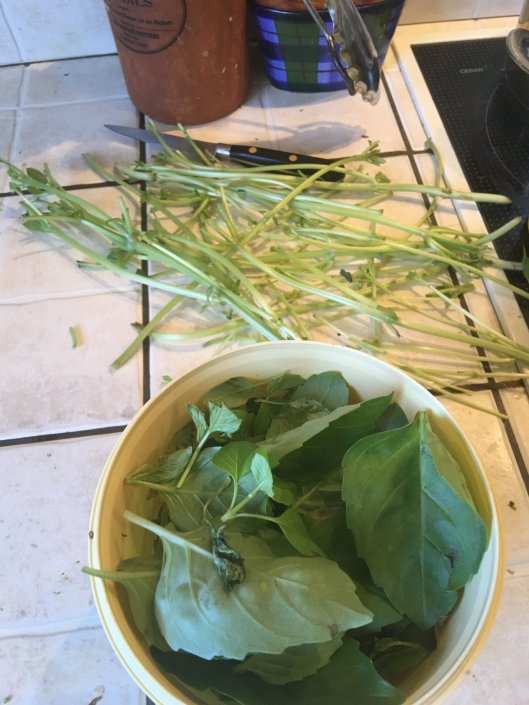 Add in a small pinch of salt and a few glugs of good olive oil. Then, using a stick blender, mash them up into a pouring consistency liquid.
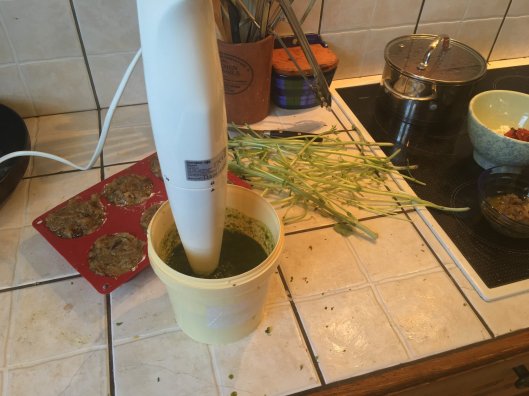 Keep adding olive oil until you have the consistency required. A large basil plant will need something like 250-350mls of oil.To serve, place your Trilogy tomato side up on a plate (a soup spoon is a good utensil for persuading them out of the mold) and dribble over a dessert spoon or two of your basil sauce.
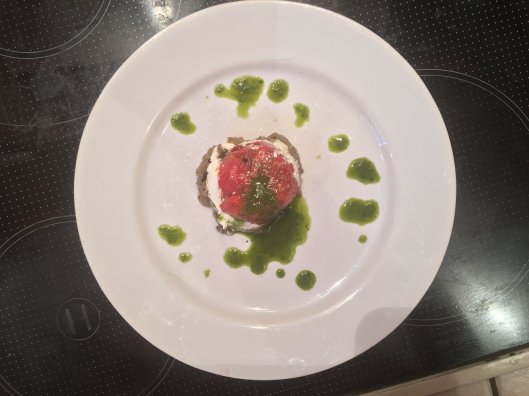 These were so popular in the restaurant in Avignon that some customers would have them as a starter and dessert.Bon appetit!
 Smearing chocolate sauce around the inside of the glass gives an interesting effect and allows small children to keep busy scraping it off later with their sundae spoons.
 Total production time is about 10 minutes, less if you get your act together and have everything ready to go at production time.Give it a go. It’s as nice for grown ups as for kids.
 The first timing sheet is the sort of thing you’d get a commis to use when they’re learning how to cook one dish; the second is the type of sheet you’d be expected to use during a whole-day exam to show your timings in 30-minute slices throughout the day of the exam. This one’s just for patisserie – I did a general cookery course, not this specialised one.The procedure is fairly simple – at the bottom you’re shouting ‘Service!’ and the
  This is what the duck breasts look like when they come out of their sous vide packaging. Note that in France these magrets de canard (nothing to do with maigret) come from ducks raised for foie gras and so may be larger than the duck breasts available in other countries where gavage is frowned upon.
 You may find that there are a few stubs of feathers sticking into the skin side – if so use a pair of fish tweezers to remove them.They’re heavy-duty tweezers with a curved end, ideal for poking into fish and other types of flesh for pulling out reluctant bones and feather roots.Once you’ve finished de-feathering, turn over your duck breast and remove the traces of fat and, in particular, two areas of what in France are called ‘nerves’ but which are really veins and/or ligaments or some such anatomical things. You should remove them as carefully as possible, since if you leave them in they’ll feel like gristle in the eater’s mouth.
 Trim around the edges to make the fat level with the meat and chunk up the fat into a fairly small brunoise-size dice. Cross-hatch the fat so that it dissolves more easily and looks prettier when you cook it. You should have an odd number of cuts down through the fat just to the flesh – everything is done in odd numbers in kitchens because it’s more pleasing to the eye.
 Place the duck breasts fat side down in a very hot pan and sear them until they’re nicely browned just on the fat side. Don’t brown the meat side at all. You can see a slight incision in the lower side of the nearer duck breast – this is where I cut out the nerve/vein/whatever so my diners don’t have a mouthful of gristle.
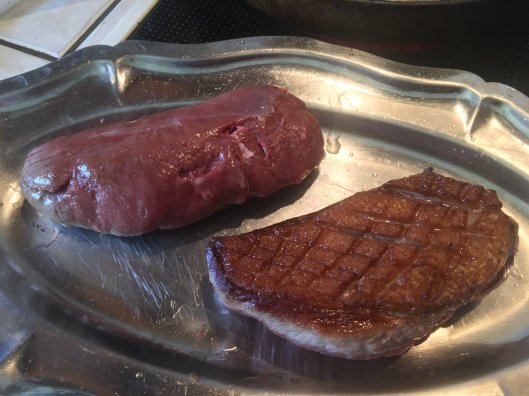 Here you can see the fat is nicely browned and quite decorative; the meat side isn’t coloured at all. When cooking time arrives they’ll go (fat side up) into a 180ºC oven for 4 minutes saignant/rare, 6 minutes à point/medium. Any more cooked than that and you’ll be in trouble with the taste police, proceed at your own risk.While the pan is still hot, throw in the bits of duck skin you cut into cubes (not the trimmings from the meat side – they’re basically inedible even to French people).
 They will colour quite quickly and you need to keep an eye on them to make sure they don’t shrivel up to nothing. But basically when they look cooked, take them out, put onto a serving tray, sprinkle with salt and try to resist the temptation to eat them all before dinner.
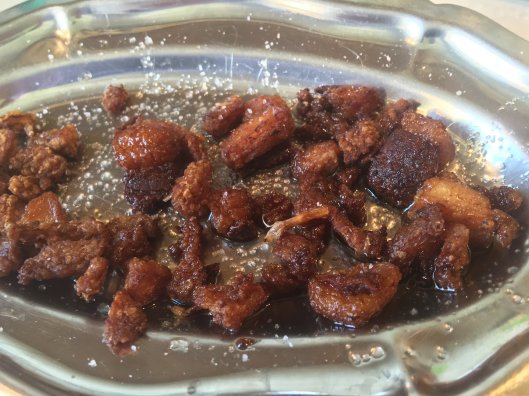 Now you have the duck prepared the mushrooms should be nicely fried off – keep an eye on them while you’re preparing the duck so they don’t stick to the pan. Now it’s time to déglace/deglaze the mushrooms with the alcohol of your choice.
  I like to use Noilly Prat vermouth or, sometimes, Muscat wine. The latter is sweet and goes well with chicken and lamb sauces. The vermouth gives a nice grown-up taste a depth to your sauce. Déglacer/deglazing means using alcohol to scrape up the caramelized bits of whatever you’re cooking that have stuck to the bottom of the pan; you add enough to cover the bottom of your pan and scrape with a wooden spatula, and then leave this to reduce until the alcohol has almost disappeared. You can add a second round of alcohol if you like or, if not, some stock.I mostly use
 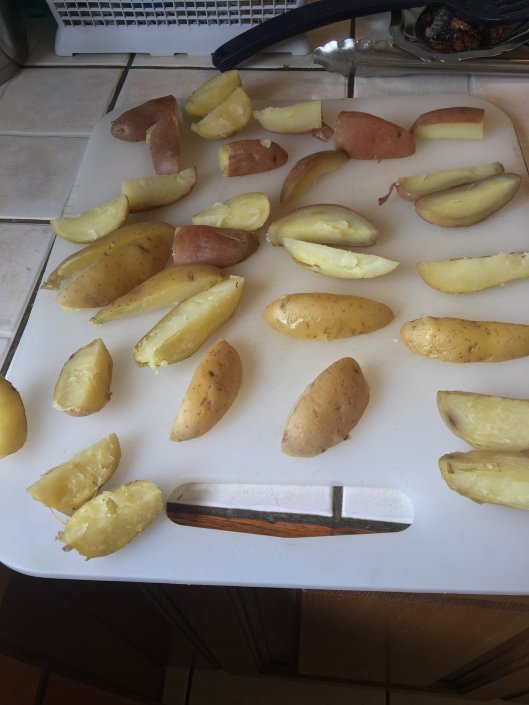 Keep them somewhere safe where they can dry a little – on the chopping board is fine. The dryness and rough bits will become nice and crunchy. Last thing to prepare is the asparagus.
 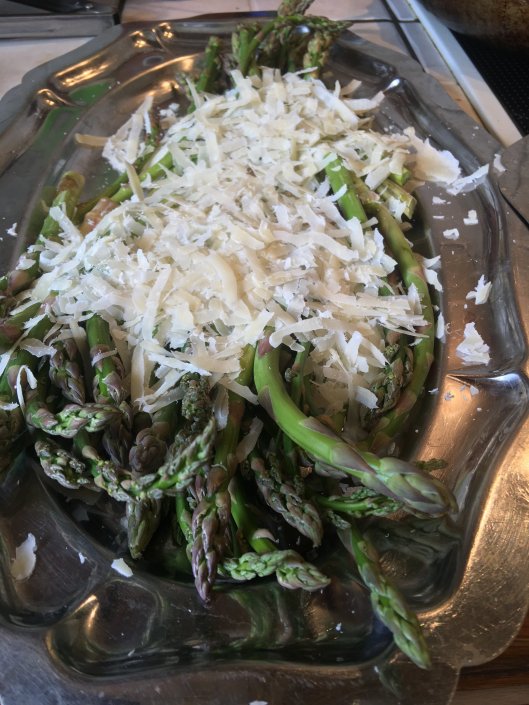 Preparing asparagus is quite simple; hold it in both hands and snap it in the middle. It has a natural break point – the lower, root end is harder and will break off easily. This is the part that’s harder to eat but which is fine used in a stock, for example, so I keep and freeze these broken off bits to use in the future.The spears I line up on a baking tray and grate parmesan across them, then grill them under a very hot heat for two or three minutes. This works well with very fine spears of asparagus, if you like the thick ones or white asparagus you’ll need to go a more traditional steaming/boiling route.So by now you should have everything ready and five or ten minutes away from being served.Make sure the kids/butler have set the table then put the duck into the pre-heated 180ºC oven, put the potatoes into the pre-heated (maximum heat please) duck fat in the frying pan and the asparagus under the grill. In this order, too.After four/five/six minutes, take the duck out of the oven and set it to one side to rest for five minutes (meat should rest for as long as it cooks, generally speaking). Put the mushroom sauce on to heat and add in some cream if you like – I usually add a 200ml briquette of single cream. This should just heat up – if it boils it may curdle.
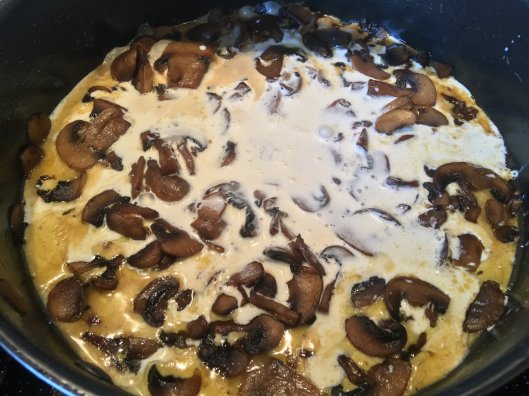 When the parmesan has melted and is browned, take the asparagus out of the oven. Keep turning the potatoes until they’re browned on all sides.
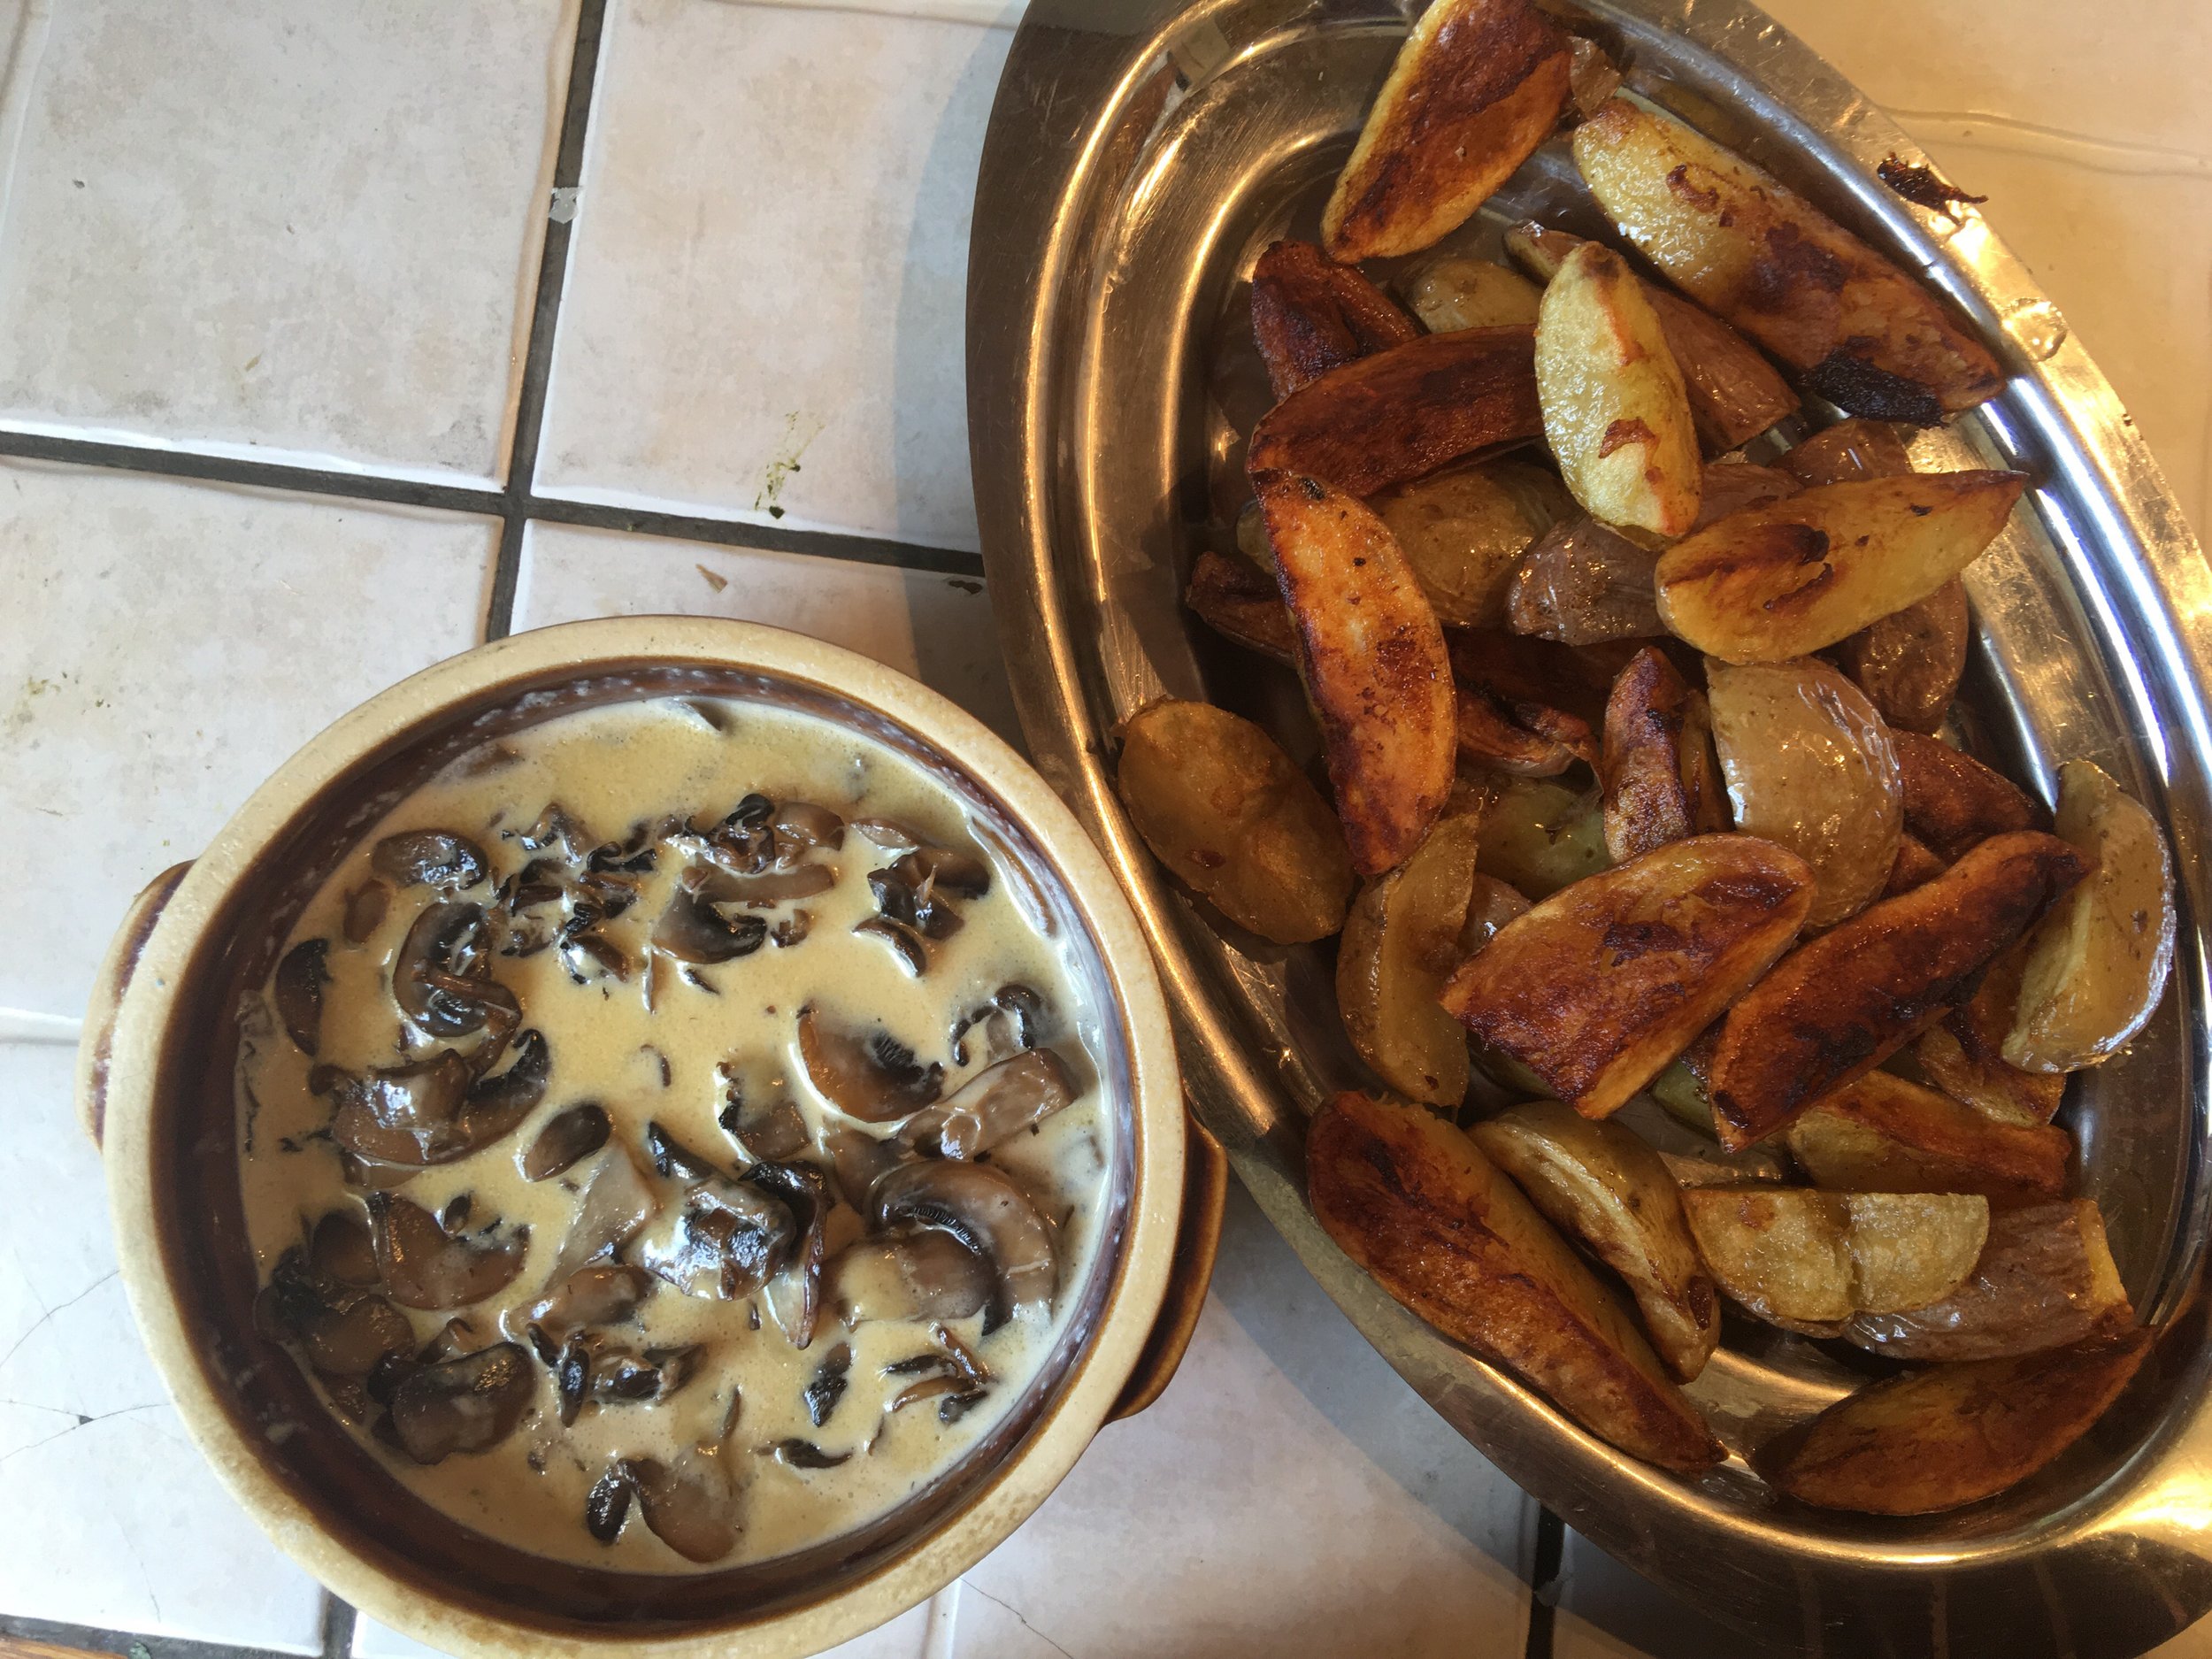

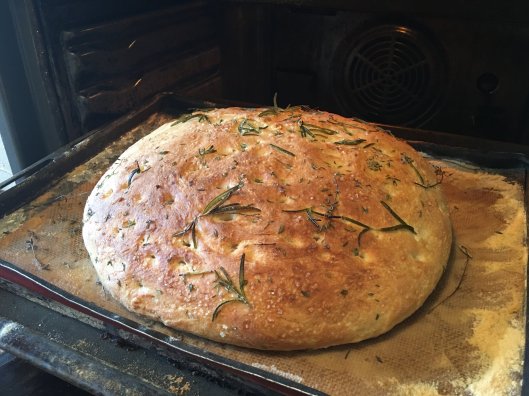
 When it’s risen again – usually 20-30 minutes later – I put it into a very hot oven (220-230ºC) and bake it for 20 – 25 minutes, turning it 180º after a quarter of an hour to ensure even browning.And it makes a very light, ciabatta-style loaf. The whole process is very simple, it’s much easier to do than to describe in fact. I use a similar process now to make brioche buns, although in this case I usually use brioche flour and a separate sachet of special brioche yeast; the all-in-one packets of brioche flour and yeast don’t seem to work so well.The bread is very tasty – it’s no sourdough special but it’s very edible, lovely with some nice paté or cheese or just used for mopping up sauce or soups.The flour is a simple packet bought from Lidl, it costs less than a euro; a whole loaf costs under 50 cents.
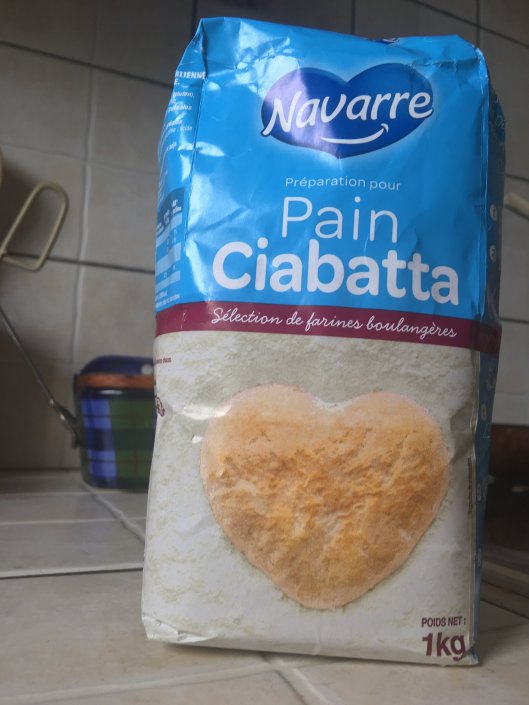 Once the bread is baked – test by rapping the underside with your knuckles, it should sound hollow – allow it to cool on a wire rack. If you just leave it on a worksurface, steam will turn to water underneath and give you a soggy bottom. Missus.If the loaf doesn’t get all eaten at once I slice it and freeze it, then can take out a slice or two at a time from the freezer. Makes great toast this way.
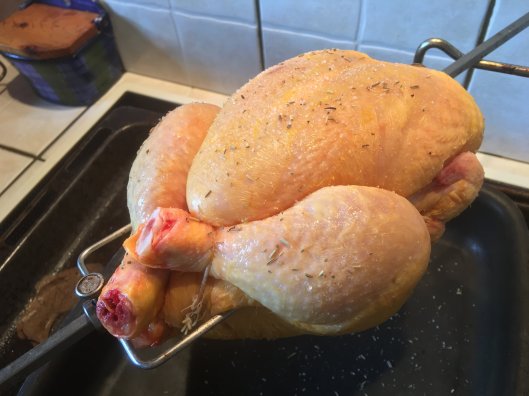 Then comes the application of a little seasoning – fine-grain salt all over and a large pinch of herbes de Provence – and the heat. In this case it’s cooked in a rotisserie oven. Which makes all the difference.Back in my professional life we’d roast a chicken for one hour; the first quarter hour on one thigh, then the second on the other thigh, the third on its chest and the final quarter of an hour on its back to crisp the breast. It’s a finnicky process because you have to set timers or have a good sense of time to keep on schedule, but it’s important to prevent whichever side is uppermost from drying out. You also have to baste your beast (as with any roast meat) using the juices in the pan.A rotisserie oven does all this for you, auto-basting the bird and ensuring that each side gets an even amount of heat, producing a far superior bird than even the most assiduously turned one.I’d like to say I carefully planned for and chose our rotisserie oven, but it was here when we moved in; and the first oven I bought in France had one too, so perhaps it’s just a Thing here. But well worth it for the difference it makes to roast chickens – I don’t use it for anything else, although perhaps I should.
 An hour or so later it’s ready, cooked to perfection. There’s a cooking pan underneath the chicken to catch the juices which I use to make a sauce. While the chicken is resting for 10-15 minutes, I put the pan on a high heat and deglaze with some alcohol – this time I used some muscat wine. Scrape up all the stuck on bits and reduce the liquid to almost nothing, then add in some chicken stock. Reduce this down until it’s the thickness you like and serve. It takes 5-10 minutes, and you can leave it alone to make a lovely sauce while you prepare your veg.And really that’s all there is to it, apart from carving the chicken which can be an art in itself. To do this properly you need to learn from a Maitre d’hotel who has learned at the side of another master, they will do it perfectly.Essentially, you remove the wings, then the legs which you divide into upper thighs and drumsticks. Then you remove the two breasts, cutting them each into two portions. In all you can make 8-10 (small) portions from a 1.5 kilo bird.Very
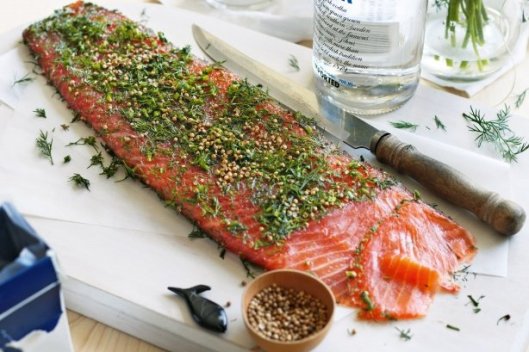
 No, it was just that I had a momentary out of body experience, looking down on a Chef de Partie doing a good job, slicing the salmon thinly but not too thin, nice big pieces, covering the plate well. And it was me doing it.Blimey. A transformation from keen amateur to cool professional overnight. With just several years of training and experience to get to that overnight transformation.Blimey.
 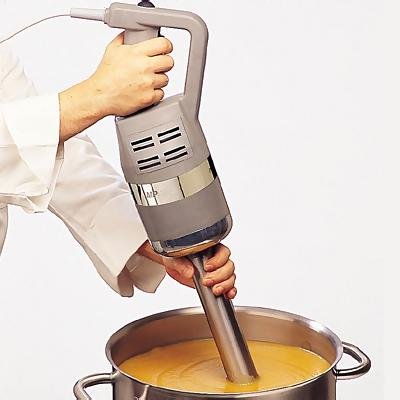 in a cold bain Marie or even an ice bath to hurry it along.So if, despite all this, you get lumps like grandma made, get out your stick whisk mixer,the one you use to make soups smooth inside the saucepan. The giraffe, we call it in French restaurants as it has a long neck. And just mix the hell out of your recalcitrant custard.If you have an evil and mean chef on your back you can instead choose to force the lumps through a fine sieve. This takes longer. Much longer. It also makes evil, mean chefs cackle a lot.So, there you go. Smooth.
 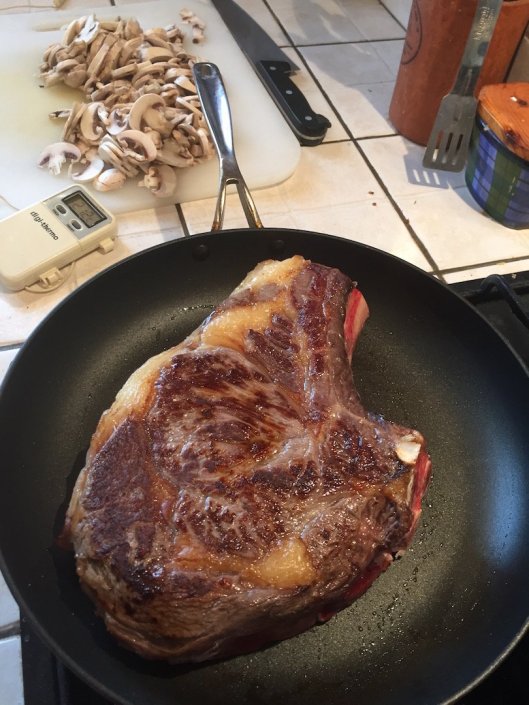 Once you’ve done the hard bit, fry off your rib of beef just to colour it – the outside looks lovely, the inside remains essentially raw. This will take about four or five minutes. Top tip: wipe the surface of the meat to get it as dry as possible; if you leave it moist this will produce steam and stop it attaining maximum heat to produce the essential Maillard Reactions. Second tip: salt the surface of the meat with fine (table) salt just before putting it in the pan; if you salt it before it’ll draw moisture out of the meat, and if you don’t salt it it won’t taste as good.Don’t be afraid to turn up the heat to maximum, since you’ll be paying close attention to it and not letting it burn.
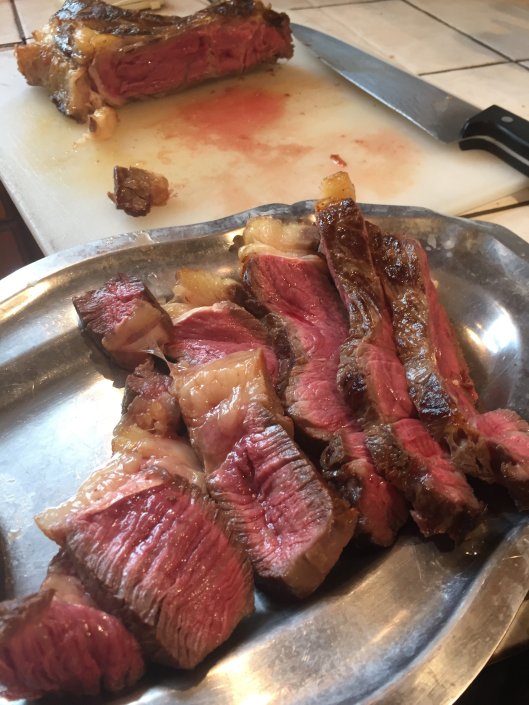 Once the rib is browned, put it into the oven at 180°C for, well, as short a time as you dare really; the one you see here had 7 minutes to come out ‘saignant’, rare. 12 minutes will give you medium. 3 hours and it’s ready for my dad.It’s very important to rest your meat for as long as you’ve cooked it – so another 7 minutes in this case. It won’t go cold, although you can cover it with some tin foil if it makes you feel happier. Resting allows the juices to return inside the cells – it’s not scooping up the juice that flows out (that you should add to your sauce), it’s making the meat itself juicier inside.Then slice and serve it.Traditionally this would be served with oven roasted potatoes (roasted in duck fat, obv.), seasonal vegetables (or just a little salad) and mushroom sauce (recipe later).